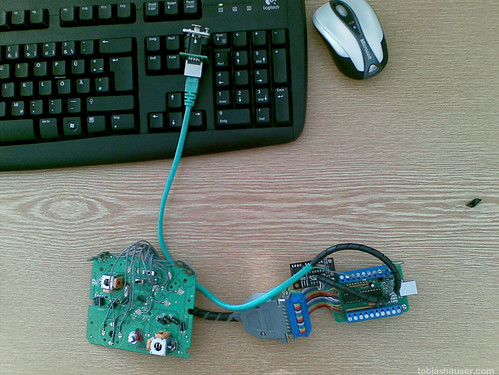
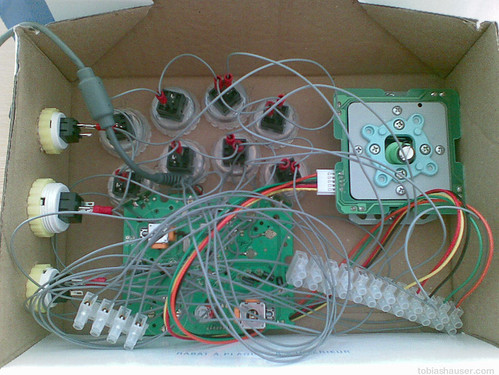
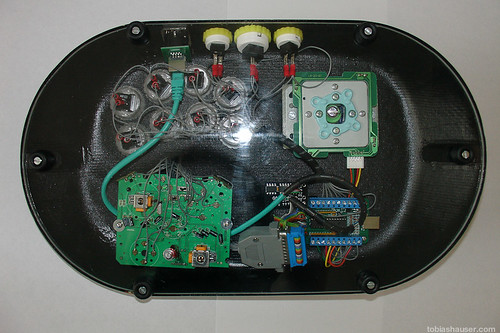
Decided to paint the interior glossy black. The exterior received a first layer of clear coat. On top of it the case received 3 pin stripes in red and gold. When discussing the colors we decided for black, red and gold as their our national colors – made in germany. Pretty international project: Stick + buttons from japan, 360 PCB ordered in the UK, Chtulhu made in the USA.
Author: th
Painting the Case I
Preparing the case for the paint job. Initially the interior was not intended to be painted. But it also received a special treatment to increase its roughness to be able to mount parts on the inside. Trying to decide on a color, black is the first thing that springs to mind. But a colored contrast would be nice, too.
Igor, Bring Me the Brain
Finished the soldering job on the PCB interconnection. We started with the MadCatz 360 PCB. But then we couldn’t resist to go dual PCB and I ordered a Cthulhu from Toodles along with an Imp electronic switch. The Imp board (the small black PCB in the picture) switched to the 360 PCB when you press the guide button while plugging in the USB cord. So now we have a brain for the stick. Or two to be exact.
Drilling the Holes
Building the Case
Emperor’s New Clothes
More parts arrived: Glass fibre in white and black (pictured) and resin (not pictured) for the case.
Got embarassed that they didn’t send a coil but packaged the fabrics into plastic bags. What you want is a surface as smooth as possibe and not a folded hanky *sigh*. That’s what you get for ordering small amounts.
Wired Up
Today I soldered the PCB together with a friend. Wired the buttons as well – until I ran out of cable. So the last 7 connections are missing. The cables run from the PCB to a terminal strip and from there to the buttons. Quick disconnects are used for the buttons. I tested all cables soldered to the PCB and all connections work – a small wonder considering this was our first time to solder.
Arcade Stick Button Layout
Now where to put all the fancy buttons? Before finalizing the case design I wanted to try button layouts. slagcoin.com is a treasure chest for all things arcade stick and he has got a large number of layouts complete with detailed measurements. The Sega Astro layout really is a winner for me.
Some gamers seem to prefere a 6 button layout and say that the additional 2 are disturbing. Also, no BEU needs 8 buttons. I think I’ll go with 8 buttons though as I want to build a stick that works with the 360 and I can use LT/RT for dashboard navigation. It will later always still be an option to NOT drill the additional 2 holes.
A Bag of Joy
In the SF4 craze it’s apparently becoming harder to find the coveted Sanwa and Seimitsu sticks and buttons. I managed to find a web shop and it’s even in Germany (arcadeshop.de). I Ordered a Seimitsu LS-32-01 stick, 8 clear white Seimitsu PS-14-KN 30mm buttons, 2 solid white Seimitsu PS-14-DN 24mm buttons (for start + back buttons) and 1 white Seimitsu PS-14-GN 30mm button (for PS3 home/ 360 guide). Rounded off with an additional clear Seimitsu ball top.
I chose the buttons because of their color (gotta love the clear Seimitsus). Since I have no experience so far with arcade sticks I relied on web wisdom to choose the stick. Because it was said to have the shorter throw I chose the LS-32-01 over the Sanwa JLF. As I have no preference for a square or octagon gate it doesn’t matter that there is no octagon option for the LS-32-01.